The rotator cuff is a group of four muscles that all attach from the superior (upper) humerus to the scapula bone in different places. Three of the muscles rotate the humerus externally (outward) and all attach to the greater tubercle. One of the muscles rotates the humerus internally (inward) and attaches to the lesser tubercle.
Anatomy and Body Awareness
SITS is the acronym that many personal trainers use to remember the four rotator cuff muscle names. Now, it’s time to go deeper and learn the exact attachment sites and how to feel them on your body. When you know where muscles attach, you can more accurately cue clients during rotator cuff exercises, by showing them exactly where to feel it.
Teaching your clients the attachments will ensure that they’re strengthening the correct muscles and also encourage body awareness. This allows you both to communicate better. When they know where a muscle attaches, can visualize it and feel it, this enhances their strengthening efforts.
It also increases your credibility and confidence as a personal trainer!
Get In The Groove with Bony Landmarks

Muscles attach to bony landmarks – on bones – through tendons. Find your bicipital groove by placing your finger tips on the superior (upper), anterior (front) of your shoulder. Rotate the humerus internally (inward) and externally (outward) until you find the biceps tendon and the groove. It’ll feel like a cord running between two bumps of bone. You might need to move your fingers around to find it. Keep rotating the humerus (arm) slowly until you do.
You can also flex your bicep and follow the muscle up to the tendon to find the groove.
Lesser tubercle of humerus – medial (toward armpit) to the groove.
Greater tubercle of humerus – lateral (away from armpit) to the groove.
These two bony bumps you feel are where one end of all the rotator cuff muscles attach. Once you locate them on yourself, then you can guide clients to know where they are also.
Connect to the Muscle Attachments
We’ll start with the one internal rotator:
Subscapularis – pink

Attachments
Subscapularis fossa of scapula. This is the anterior surface of the scapula, it faces the rib cage. “Sub” like submarine. It’s the under-side of the scapula.
Lesser tubercle of humerus. This is the smaller protuberance of two that sit on either side of the bicipital groove (see above). It’s medial to the groove and smaller.
Now, the three external rotators:
Infraspinatus – green
Attachments
Infraspinatus fossa of scapula. This is the posterior surface of the scapula, it’s the other side of scapula from subscapularis. It’s below the spine of scapula, which is what “infra” means – below.
Greater tubercle of humerus. This is the larger protuberance of two that sit on either side of the bicipital groove (see above). It’s lateral to the groove and larger.
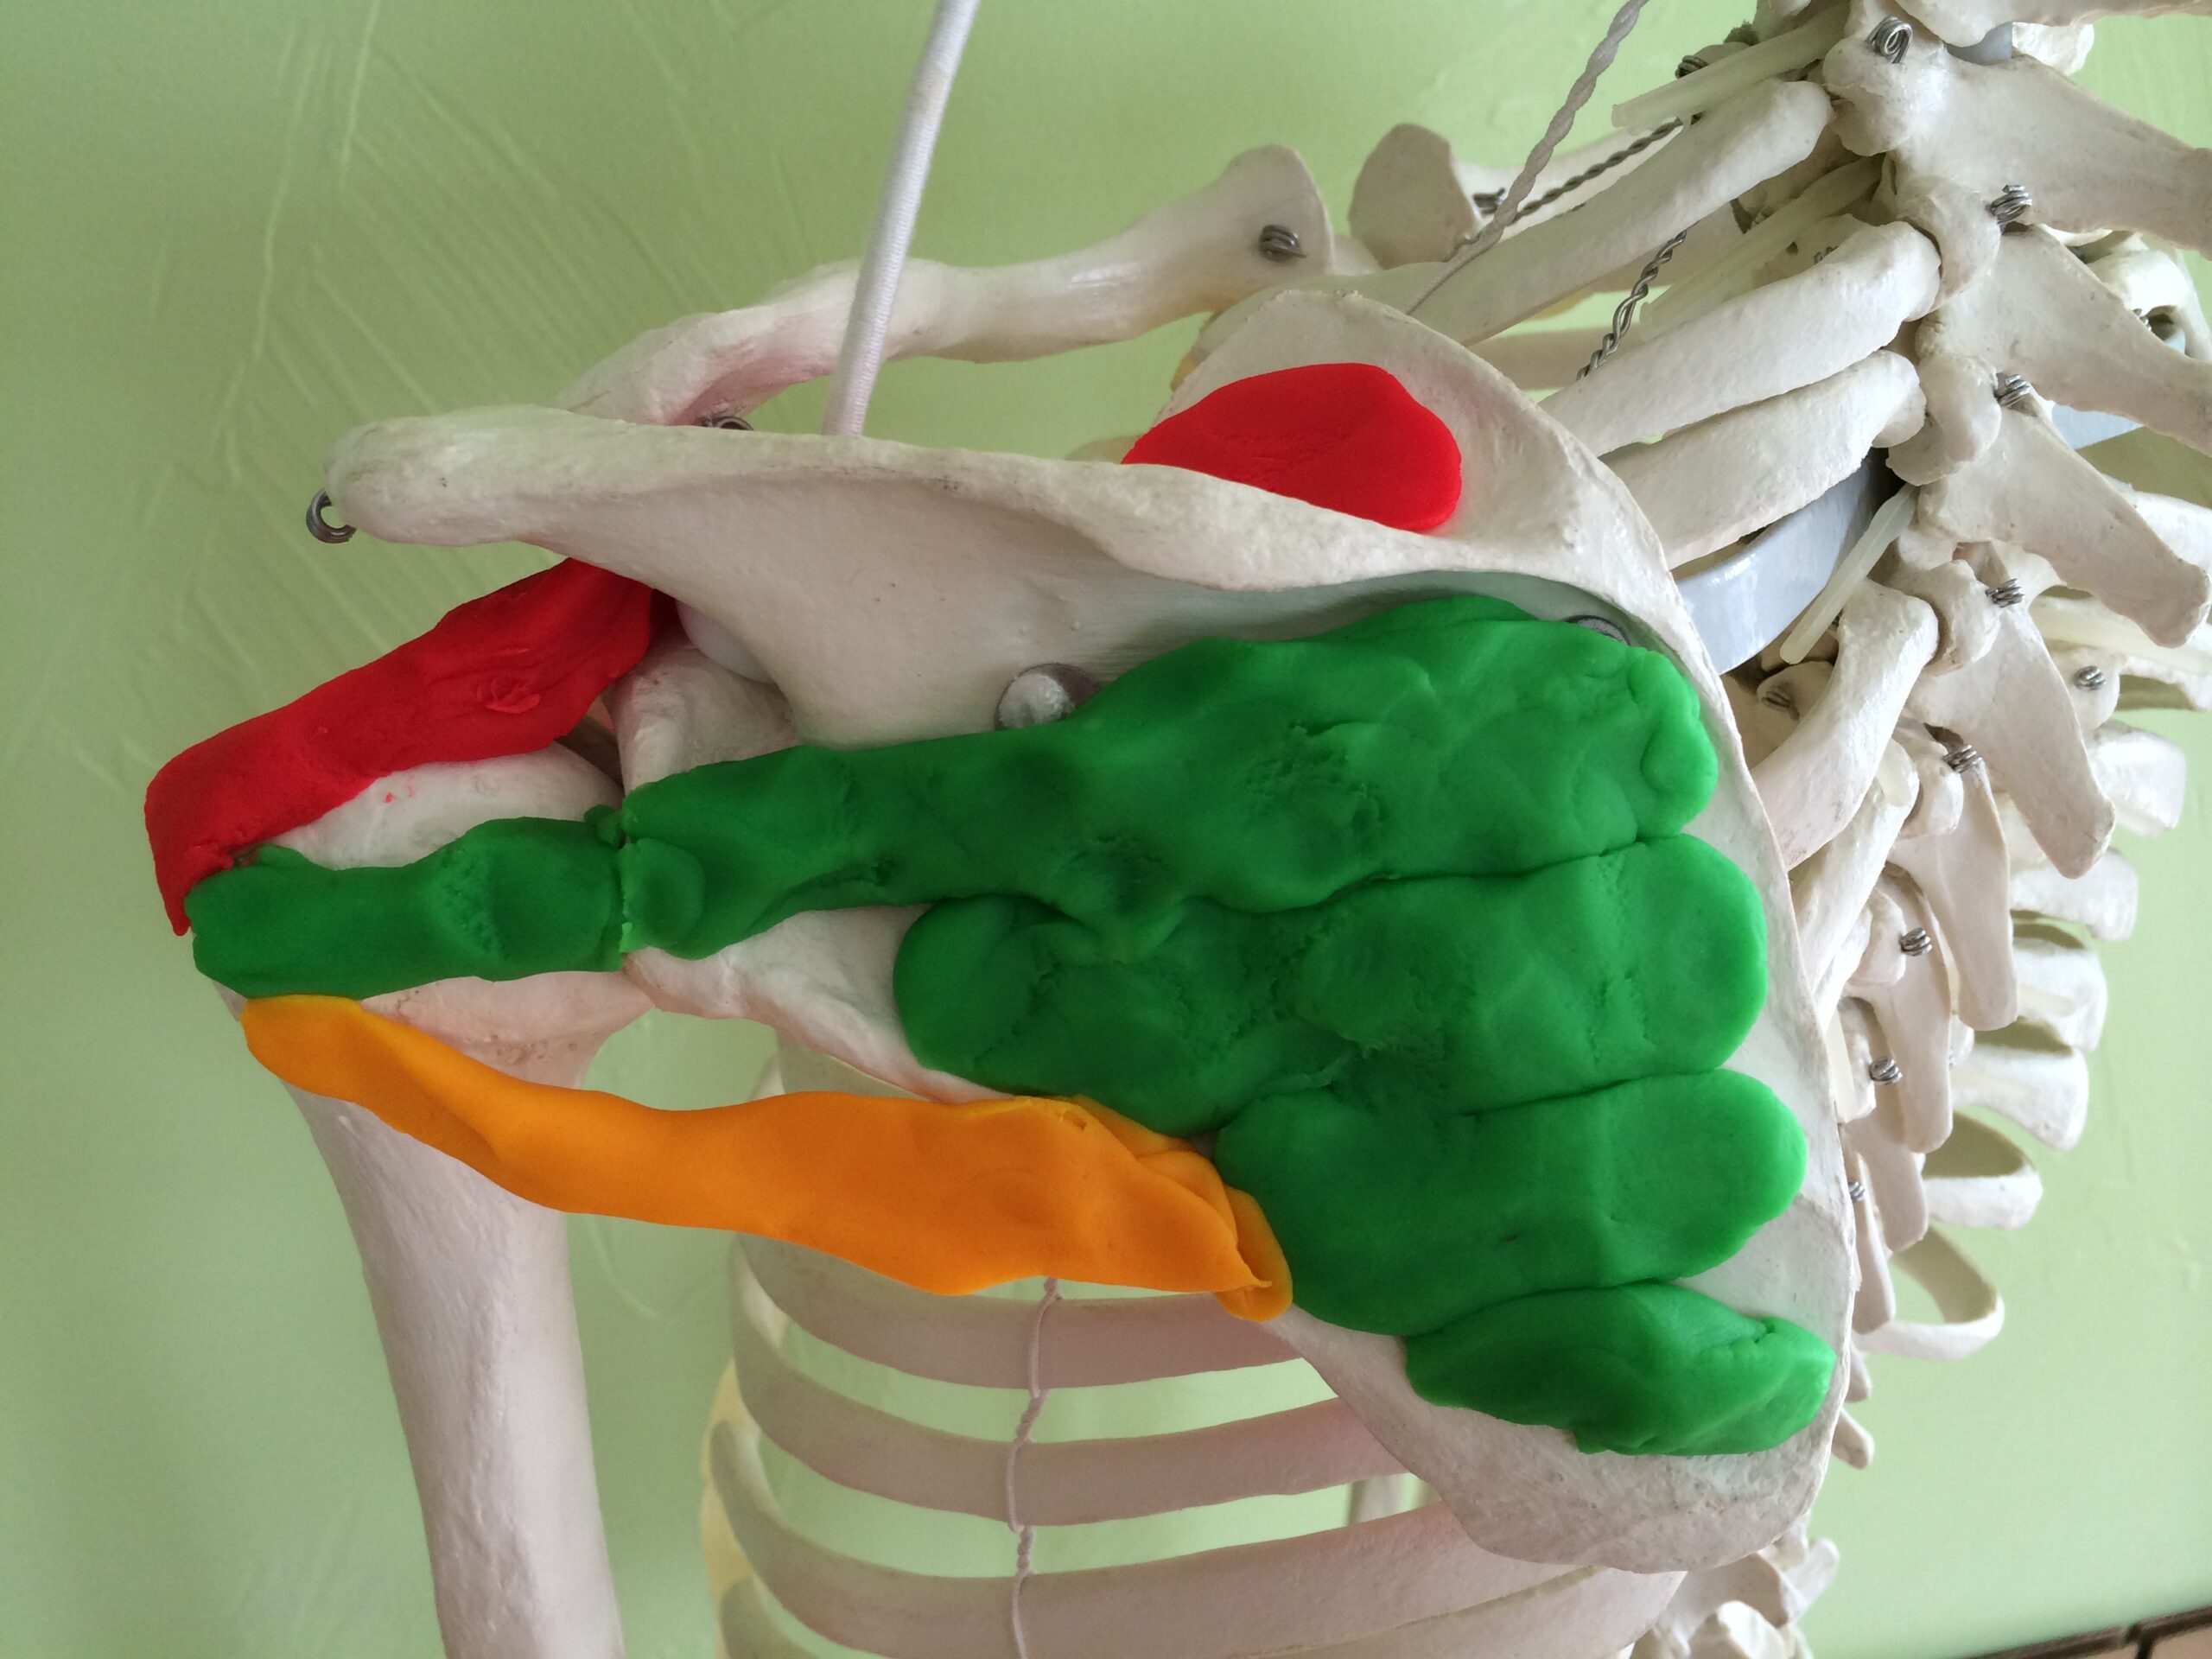
Teres Minor -orange
Attachments
Lateral/Superior border of scapula. The glenoid fossa is where the humeral head meets the scapula directly through cartilage. Just inferior (below) to it, on the outer ridge of the scapula is where the triceps attaches, just inferior to that is the teres minor attachment.
Greater tubercle of humerus. See description above.
Supraspinatus – red
Attachments
Supraspinatus fossa of scapula. This is the superior surface of the scapula, it’s above the spine of scapula, just like the infraspinatus is below the spine of scapula – hence “supra”. It’s a hollowed out area where the muscle attaches and looks like a half pipe for snowboarding or skateboarding.
Greater tubercle of humerus. See description above.
Common Mistakes With Rotator Cuff Exercises
#1 Too much motion. When you externally rotate the humerus to it’s extreme, it’ll stop and the scapula will then start moving. Trapezius and rhomboids will contract to make this happen. It’ll reduce the amount of strengthening for the rotator cuff.
#2 Too much resistance. If you use too much weight, the body will recruit other, stronger, and larger muscles to obtain the movement. This might land up being more scapular movement than humeral movement and is taking away from the goal of strengthening the rotator cuff.
#3 Moving too fast. In order to know if #1 or #2 is happening, you have to go slow through the motion.
Benefits of Strengthening The Rotator Cuff
The rotator cuff muscles stabilize the humeral head onto the scapula. When strengthened properly, they work more effectively. If they’re weak, scapula-humeral rhythm gets off track and can cause injury to the delicate structures around the gleno-humeral joint.
Bonus Fact: The supraspinatus muscle assists with humeral abduction (away from midline), while the other three muscles assist with humeral adduction (closer to midline).
Bonus Tip: The best way to learn the attachments is on a partner. Explore outside of work, so you feel comfortable. Have the partner do a rotator cuff exercise while you palpate and feel for the tendons at the attachment sites, on the body landmarks. Once you feel them on a partner, it’ll be easier to find them on clients with confidence.
Refresh your anatomy knowledge with NFPT’s Anatomy Fundamentals Course